Most knee replacement exercise programs are organized by week. Week one, do these. Week four, do those.
The problem is that your knee doesn’t know what week it is.
I’ve had patients bending 95 degrees at ten days and others fighting for 80 at six weeks, and both were doing everything right.
A program built on the calendar tells the first person to hold back and the second person they’ve failed.
So this exercise guide is organized by what your knee can actually do – your degree of bend tells you which phase you’re in (and your knee tells you when to move on).
If you’re not sure where you stand, start with my guide to knee replacement range of motion, then come back.
First: The Phases Overlap, and That’s Normal
Before the lists, something important.
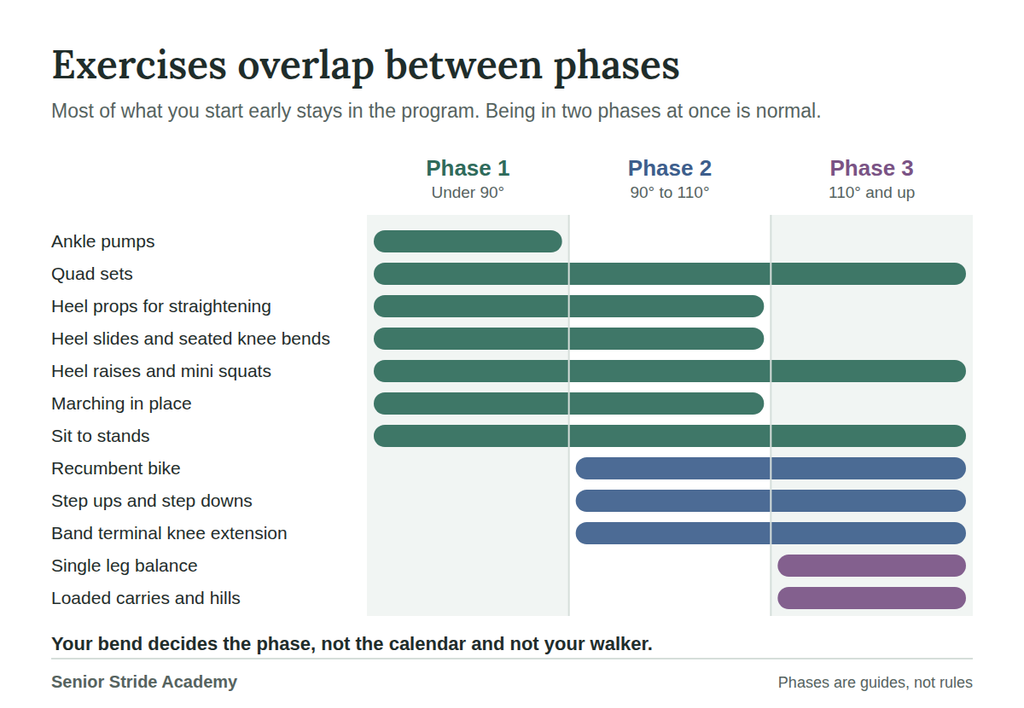
These phases aren’t three separate programs where you finish one and throw it away – they overlap, heavily, and they’re supposed to.
Quad sets are a phase 1 exercise, but I often still have patients doing them in phase 3, because a thigh muscle that won’t fire is a problem at any stage.
Heel props stay in the program until the knee is fully straight, however long that takes. And plenty of phase 2 exercises can start early in small doses.
It’s also normal to be in two phases at once.
Bend that’s still under 90 while your strength is coming along nicely? That happens all the time.
Work the phase you’re in for the thing that’s behind, and keep moving ahead on the parts that are ready.
One more thing: these phases aren’t about your assistive device. Plenty of people are still using a walker in phase 2, and that’s completely fine. The device follows your strength and balance on its own schedule. Don’t rush it, and don’t take it as a grade.
Which Phase Are You In?
| Phase | Where your knee is |
|---|---|
| Phase 1 | Bend under about 90°, swelling still significant, thigh muscle slow to fire |
| Phase 2 | Bend roughly 90–110°, swelling coming down, walking further each week |
| Phase 3 | Bend past 110°, swelling mostly settled, working on strength and confidence |
Phase 1: Calm the Swelling, Wake the Muscle, Win the Motion
Where you are: bend under about 90 degrees, knee still warm and puffy, thigh muscle sluggish.
What matters most now: getting the knee straight, keeping swelling down, and getting the quad firing again. Strength can wait a few weeks, but motion can’t.
Do these daily, several times a day, in short sessions. Ten to fifteen repetitions of each is plenty.
Ankle pumps. Point and flex your foot, 20 times, several times a day. Helps circulation and swelling.
Quad sets. Lying with the leg straight, tighten your thigh and press the back of your knee down. Hold 5 seconds. This is the most important exercise in this phase and the one most people skim past.
Heel props. Rolled towel or small pillow under the heel, nothing under the knee, let gravity straighten it. Five to ten minutes, several times a day. Good idea to Ice while you’re there and feel free to perform quad sets in this position too.
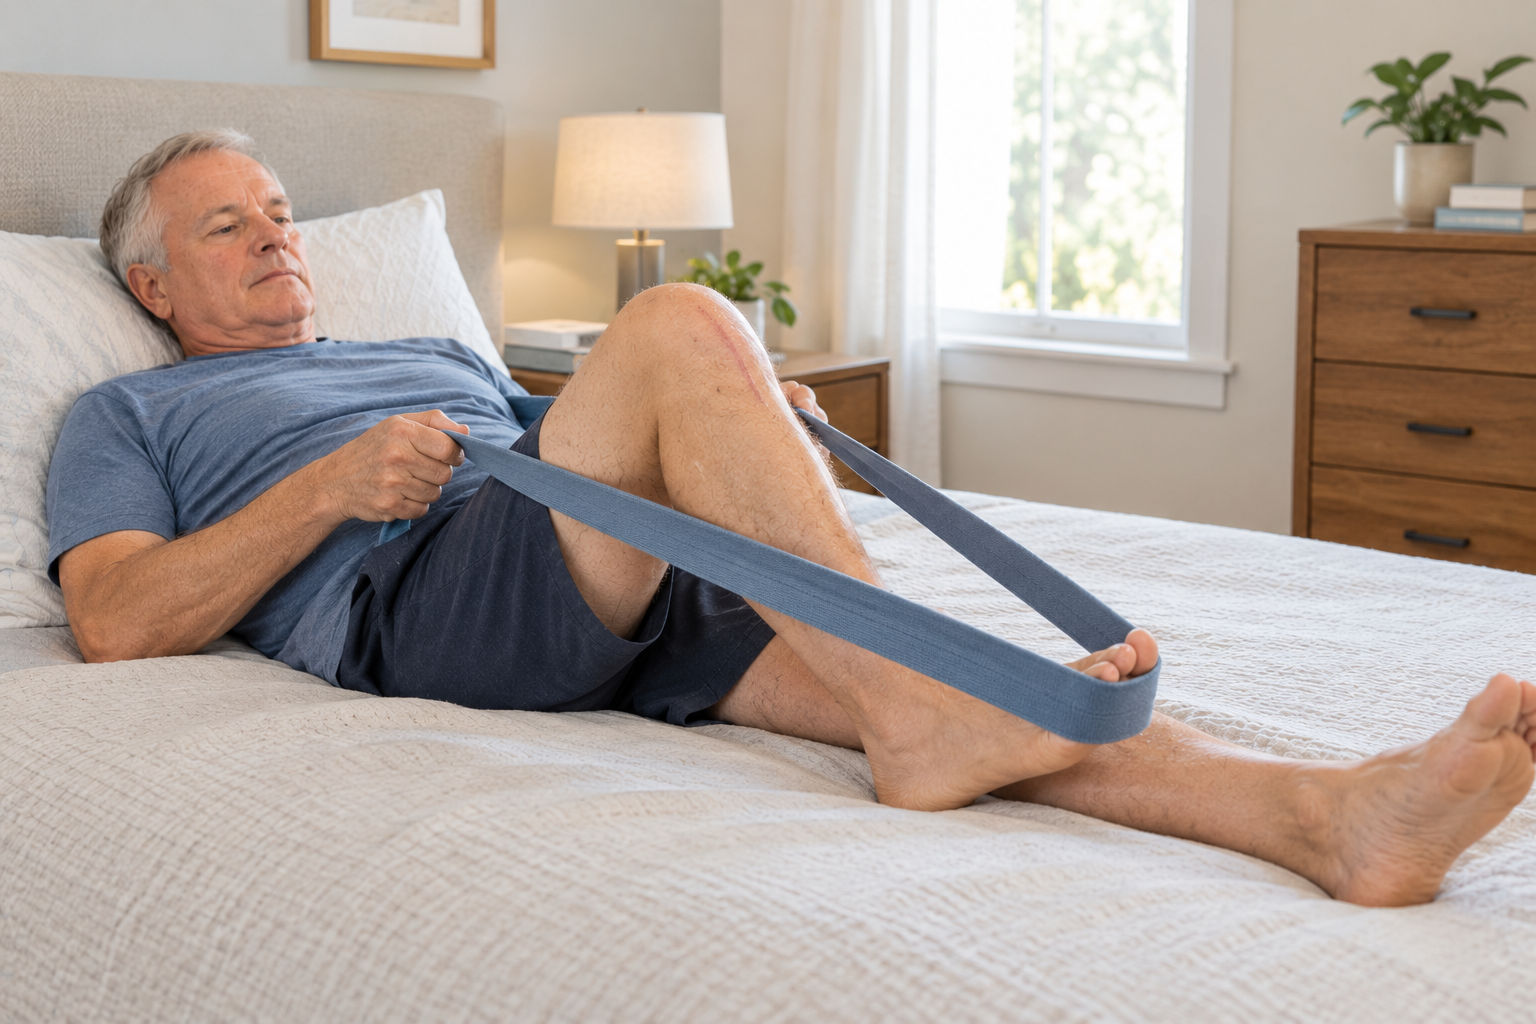
Heel slides. Slide your heel toward your bottom as far as it will go, hold, slide back. A strap around the foot helps you pull further. This can be done lying in bed or sitting in a chair (you usually get a few extra degrees sitting in a chair, while wearing a sock and sliding on a hardwood floor.
Glute sets. Squeeze your buttocks for 5 seconds. Hips do a lot of the work of walking, and they get weak fast when you’re sitting more than usual.
Short arc quads. With a rolled towel or firm pillow under the knee, straighten just the lower leg and hold 3 to 5 seconds. A useful bridge if a full straight leg raise is out of reach.
Standing work belongs here too
People often think standing exercise is for later. It isn’t. As long as you have something solid to hold and you can bear weight, these belong in phase 1:
Heel raises. Hands on the counter, rise onto your toes, lower slowly. 10 to 15 reps.
Mini squats. Hands on the counter, bend both knees a few inches, keep your weight even, come back up. Small range. This is one of the best early ways to get the quad working without straining the joint.
Marching in place. Holding the counter, lift one knee toward hip height, then the other. Works the hip flexors and rehearses the walking pattern.
Sit to stands. From a firm chair, use your hands as much as you need. Aim to load both legs evenly rather than leaning hard toward the good side, which is where limps get learned.
Short, frequent walks. A few minutes several times a day beats twenty minutes once. Long outings early leave the knee swollen for two days, and a swollen knee bends less.
→ Move to phase 2 when: your bend is reliably past about 90 degrees, your knee is close to straight or clearly heading there, and the swelling is settling instead of flaring after everything you do.
Phase 2: Build Strength Through Range
Where you are: bend roughly 90 to 110 degrees, swelling improving, walking further. Possibly still with a walker or cane. That’s fine.
What matters most now: turning motion into usable strength, and stretching the last of the bend. Keep the phase 1 work going, especially heel props if you’re still short of full extension.
The recumbent bike. If you have access to one, this is the centerpiece of phase 2. Start with the seat back and rock through partial circles, pushing a little further each time. Full revolutions take around 110 degrees, so the day you get all the way around is both a milestone and a sign you’re heading for phase 3. Once you’re going around, ride 10 to 15 minutes with light resistance. My recumbent bike guide covers what to look for if you’re buying.
Deeper mini squats. Same as phase 1, but lower, with less help from your hands.
Step ups. Start with a 4-inch step or the bottom stair. Step up with the operated leg, then down. Slow and controlled beats fast and sloppy. Hold the rail.
Step downs. Harder than step ups, and the one that matters for stairs and curbs. Stand on the step, lower the other foot slowly to the floor, then come back up. Your operated leg is doing the work on the way down.
Sit to stands without hands. When you can, fold your arms and stand. Then slow the sitting down to 3 seconds, which builds control.
Standing hamstring curls. Holding the counter, bend your knee to bring your heel toward your bottom. Doubles as an active flexion stretch.
Side stepping. Holding the counter, step sideways 10 steps each way. Hip strength on the sides is what keeps you steady on one leg.
Terminal knee extension with a band. Loop a resistance band around a table leg and behind your knee, then straighten the knee against the pull. This trains the last few degrees of straightening, which is usually the stubborn part.
Longer walks, and stairs. Start stairs one foot at a time, both feet on each step, holding the rail. Up with the good leg, down with the operated leg.
→ Move to phase 3 when: your bend is past about 110 degrees, you can stand from a chair without using your hands, and you can manage a flight of stairs with the rail.
Phase 3: Strength, Balance, and Getting Your Life Back
Where you are: bend past 110, swelling mostly gone, walking without a device or nearly so.
What matters most now: single-leg strength, balance, and confidence. This is the phase people skip, and it’s why some knees stay stiff and weak a year later. Motion levels off, but strength keeps improving for a long time if you keep after it.
Two or three sessions a week is enough here, unlike the daily work of the early phases.
Step over step stairs. One foot per step, going up and then going down. Down is harder and comes later.
Single leg balance. Hold the counter, stand on the operated leg, then reduce to fingertips, then hands free. Work toward 30 seconds. If balance is a bigger issue for you, my Strong & Steady 21-Day Balance Program is built for exactly this.
Higher step ups and step downs. Move to a 6-inch or 8-inch step as you’re able.
Sit to stands from a lower chair, or from a chair with a cushion removed.
Split stance work. One foot forward, one back, lower a few inches and come back up. Go only as deep as stays comfortable.
Loaded carries. Walk around the house holding a grocery bag or a gallon jug in each hand. Real-world strength for real-world tasks.
Bike with resistance, or a longer walk with hills.
Back to what you enjoy. Walking, golf, doubles tennis, cycling, swimming, dancing. The implant is happiest with steady, moderate activity, and most surgeons only rule out running and high-impact sport.
How Hard, How Often, How Sore
Early phases: short and often. Several sessions a day, 10 to 15 reps each. Frequency beats intensity when the goal is motion and waking the muscle.
Later phases: fewer, harder sessions. Two or three strength sessions a week with enough resistance that the last couple of reps are a challenge.
The soreness rule: achy during and after is fine. Soreness that settles within an hour is fine. What isn’t fine is sharp pain during an exercise, pain that lingers for a couple days, or swelling that keeps building day after day. Those mean you’re irritating the joint, and an irritated knee swells, and a swollen knee bends less.
Back off when that happens, but don’t stop altogether.
And remember, ice is your best friend after a knee replacement.
A Few Things to Skip
Deep squats and low seats, early on. There’s no reward in them and they load the joint hard.
Heavy seated leg extensions. The machine version with a lot of weight puts a big load on the kneecap for little functional gain. Band-resisted terminal knee extension does the job better.
Running and jumping. Most surgeons advise against impact sport for good. Walking, cycling, and swimming give you the same fitness without the wear.
Kneeling, until it’s comfortable. It won’t damage the implant, but it feels strange or tender for many people, sometimes permanently. Use a cushion, and don’t force it.
When to Call Your Surgeon or PT
- Your bend hasn’t improved over two consecutive weeks of steady work
- You’re still at or below 90 degrees of bend at around 4 weeks
- You can’t straighten to within about 10 degrees of flat after 4 weeks
- You lose motion you had already gained
- The knee becomes hot, red, or increasingly swollen, or you develop a fever or drainage from the incision
- New calf pain, swelling, or tenderness, which needs same-day attention
Final Thoughts
The most common mistake I see isn’t overdoing it. It’s under-doing it or stopping too soon.
Many times, formal physical therapy ends somewhere around the point where you can walk to the mailbox and get up from your chair, and a lot of people take that as the finish line.
But it shouldn’t be.
Phase 3 is where the knee goes from working to feeling like yours again, and almost all of that work happens without a therapist standing there.
So, keep two or three sessions a week on the calendar after you’re discharged.
Keep using the stairs, the step, and the bike.
The knee you’ll have in a year is largely decided by what you do in the months after everyone stops checking on you.
Frequently Asked Questions
What exercises should I do right after knee replacement surgery?
Start with ankle pumps, quad sets, heel props for straightening, and heel slides for bending, several times a day. Add standing work like heel raises, mini squats, and marching in place as soon as you can hold a counter and bear weight comfortably.
How often should I do knee replacement exercises?
In the first weeks, several short sessions a day beats one long one. Later, when the focus shifts to strength, two or three harder sessions a week works better.
Can I do standing exercises in the first two weeks?
Usually yes, as long as you have something solid to hold and your surgeon has cleared you to put weight through the leg. Heel raises, mini squats, and marching in place are all reasonable early.
How do I know when to move to the next phase?
Use your knee, not the calendar. Past about 90 degrees of bend moves you into phase 2. Past about 110 degrees, plus standing from a chair without your hands, moves you into phase 3.
Is it normal to still be using a walker in phase 2?
Yes. The walking device follows your strength and balance, not your range of motion. Plenty of people are still using one while doing phase 2 exercises.
How long should I keep doing these exercises?
Strength keeps improving for a year or more after surgery. Most people should keep two or three sessions a week going long after formal therapy ends.
This article is educational and doesn’t replace individual assessment. Your surgeon and physical therapist know your knee, and their instructions come first. If you have calf pain or swelling, fever, redness, drainage from the incision, or sudden severe pain, contact your surgeon right away.