Getting onto an inversion table is pretty easy, but getting off one is a skill.
Especially for seniors.
And that second part is what nobody wants to tell you.
Sure, the manuals cover it, but in language written by engineers rather than by anyone who has stood next to a 76-year-old attempting it for the first time.
Most seniors screening themselves for inversion focus on their diagnoses.
And don’t get me wrong – those matter a lot.
I’ve actually written a full guide on who shouldn’t use an inversion table, but for a lot of older adults the deciding question isn’t medical at all.
It’s whether you can operate the machine on your own, on a bad day, without help in the house.
So, in this article, we’ll go over the whole sequence of getting on and off and inversion table, including the parts that tend to go wrong.
Affiliate Disclosure: Senior Stride Academy is a Teeter affiliate. If you purchase through links on this page, we may earn a commission at no extra cost to you. This does not affect which model we recommend — both links pay us the same.
Before You Buy: Four Tests You Can Do Right Now
Do these in your living room – they take five minutes and they’ll tell you more than any review will.
Test 1: The step-over. Place a broom handle on the floor and step over it, forward, one foot at a time, while holding a countertop with one hand. You have to clear the main shaft of the table to get into position. If your foot catches, if you have to look down the entire time, or if you shuffle rather than clear the floor, that’s your first honest answer. This is a trip hazard placed directly in front of a piece of equipment you’re about to hang upside down from.
Test 2: The reach. Sit in a dining chair. Without holding anything, bend forward and touch the top of your foot with both hands. Hold for three seconds. Sit up. This approximates reaching the ankle lock. If you can’t get there, or you get there but feel dizzy sitting back up, note it. Some models put a long handle on the ankle lock so you don’t have to reach – that’s a purchase decision this test should drive.
Test 3: The knee bend and scoot. Lie on your back on your bed with your legs straight. Bend both knees, slide your hips a few inches toward the foot of the bed, and straighten again. That’s the recovery maneuver, and you’ll be doing it head-down. If it’s hard flat on a mattress, it will be harder inverted.
Test 4: The stand-up. After Test 3, stand up from lying and stay still for thirty seconds. Any lightheadedness? Blurred vision? Need to grab something? Make a note. This matters more than most people realize, and I’ll come back to it.

→ If you scored three or more, you should be able to get on/off an inversion table. See our comparison of the top inversion tables for more info.
→ If you scored two or less, check out our guide on inversion table alternatives for better options.
Why Most Seniors “Can’t Get Back Up”
Here’s the thing that surprises people – the overwhelming majority of “I couldn’t return upright” stories are not strength problems.
They’re setup problems.
The table balances on a pivot. Where your body sits relative to that pivot determines whether small arm movements rotate you or whether you’re stuck fighting your own weight.
Teeter, one of the top brands in home inversion tables, is direct about this: if your rotation is too aggressive and you’re having trouble returning upright, lengthen the main shaft and test again.
If it barely rotates at all, shorten it.
That’s a two-second adjustment that fixes the problem almost everyone panics about.
Set your height first. The spring-loaded locking pin found on the main shaft of Teeter inversion tables selects your height setting. Teeter recommends starting an inch taller than your actual height and testing from there, since the right setting varies by several inches depending on how your weight is distributed.
Set it an inch taller than your height. Then test. If returning upright takes effort, go taller again.
Then set your angle. The tether strap limits how far you rotate. Some models have an EZ-Angle Tether marked at 20, 40, and 60 degrees, and all of them can be micro-adjusted. Teeter’s guidance for new users is to stay between 20 and 45 degrees at first and increase gradually.

For an older adult, I’d start at 20 degrees and stay there for at least a week to see how everything feels. There’s no prize for going deeper faster.
Then check the hinge setting. The roller hinges found on Teeter models control how responsive the rotation is. This is the dial that determines whether the table feels twitchy or sluggish, and it’s worth adjusting with someone present before you use it alone.
Test the whole thing empty. Rotate the bed by hand before you ever get on it and confirm it moves smoothly. Confirm the main shaft is resting against the crossbar bumper – if it isn’t, the bed has been assembled backwards onto the frame, and that has to be corrected before anyone uses it.
What to Wear
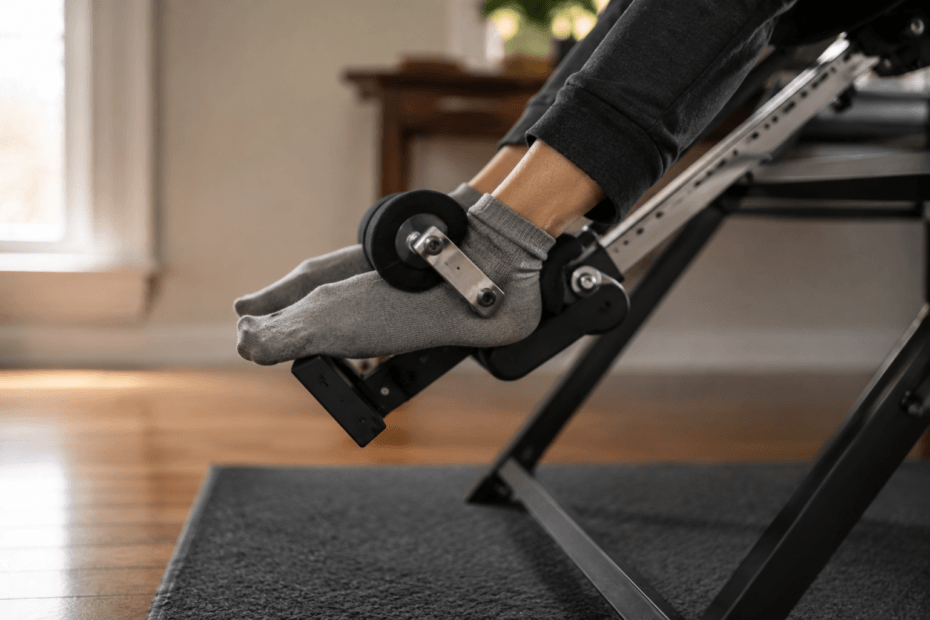
Socks or thin flat shoes.
No thick soles, no boots, no high-tops, nothing that extends above the anklebone, because it interferes with securing the ankle lock.
I’d add two things that could be helpful:
- wear something with a bit of grip on the sole, because you’re stepping onto a platform
- and if you have fragile skin or swelling around the ankles, a thin sock may not be enough padding – try a folded washcloth under the cuff before you decide the whole machine doesn’t work for you
Getting On, Step by Step
Do this the same way every single time. The routine is the safety feature.
1. Clear the space and bring your phone. Put it in a pocket, not on a table across the room. You should also have your owner’s manual attached to the frame (where Teeter intends it to stay permanently).
2. Confirm your settings. Height pin engaged, tether set, hinges where you left them. Every time, not just the first time.
3. Step over the main shaft. One foot at a time, one hand on the frame (this is where people want to rush).
4. Sit back onto the bed with both feet still on the floor. Do not lean back yet. This is a controlled sit onto an inclined surface, which is different from sitting in a chair – expect it to feel odd the first time.
5. Step onto the foot platform one foot at a time. Adjust the back of the cushioned ankle supports so they wrap your ankles properly.
6. Close the ankle lock snugly. You want minimal distance between the lock and the top of your foot. This isn’t about comfort preference – a loose lock lets your body slide down the bed while inverted, which shifts your weight distribution and makes returning upright harder.
7. Verify it. Teeter teaches a hear, see, feel, test check: hear the mechanism engage, see it seated, feel it snug, and test by tugging before you commit any weight.
Rotating Back
Raise both arms slowly overhead.
That’s it.
The weight of your arms moving past the pivot is what rotates you (on a Teeter inversion table anyway).
Move slowly and stop where you planned to stop.
And don’t forget to breathe.
The whole point is to let your back muscles release, which doesn’t happen if you’re braced and gripping.
If you want more stretch without more angle, traction handles let you add decompression at shallow angles – a great option for people who shouldn’t be going steep.
Returning Upright: The Exact Sequence
Bring your arms slowly back down to your sides – you should begin rotating up.
Then do the thing almost nobody does: stop and rest just short of horizontal.
Teeter recommends this so your spine re-compresses gradually instead of all at once.
I’d underline it for anyone with disc disease or a compression fracture history – the re-loading is the part that hurts people, not the hanging.
If you don’t come up with arm weight alone: stay relaxed and do not lift your head. Bend your knees and scoot slightly toward the foot end of the bed. That shifts your weight past the pivot. This is the single most important paragraph in this article, because the instinct is to sit up, and sitting up is exactly what doesn’t work.
If you have to do the knee-bend maneuver every session, your height setting is wrong – lengthen the main shaft.
If you went to full inversion, pull the table back toward you out of the locked-out position first, let yourself settle at 60 degrees for a moment, then bring your arms down. Teeter’s own recommendation is not to attempt full inversion until you’ve been inverting for several weeks and are completely comfortable at 60 degrees. Plenty of people never go there at all and that’s perfectly ok.
Getting Off: The Part That Injures People
You’ve been head-down. Your blood pressure regulation has been doing something unusual, and now you’re about to stand up.
This is where I’ve seen the real problems, and it’s not a spine issue – it’s something called orthostatic hypotension.
It’s basically a condition where your blood pressure drops momentarily when going from lying to sitting or from sitting to standing.
And with inversion, you’re kinda doing both.
This can cause dizziness and significantly increase your fall risk.
If you take blood pressure medication, diuretics, or anything that affects your heart rate, your body is already worse at handling position changes than it was twenty years ago.
Add inversion and you have a genuine fall risk in the thirty seconds after you dismount.
So:
Sit upright on the bed for a full minute before releasing your ankles. Count it. Don’t estimate it.
Release the ankle lock while still seated. Both hands on the frame as you come forward.
Step off one foot at a time and stand still for thirty seconds with a hand on the frame before you walk anywhere.
Then walk. Not to the kitchen, not down the stairs. Walk a few steps in the room first.
If you feel lightheaded at any point in that sequence, sit back down.
If it happens more than once, that’s worth mentioning to your doctor, and it’s worth reading about the difference between vertigo and dizziness, because they point at different problems.
If You Get Stuck
Have a plan before you need one. This is the fear that stops most people from buying, and it deserves a real answer rather than reassurance.
Stay relaxed and do not fight it. Panic tightens everything and makes the weight shift harder.
Bend your knees and scoot toward the foot end. Nine times out of ten this solves it.
Do not lift your head or try to sit up. It moves your weight the wrong direction.
Grab the frame. FitSpine beds and frames include grips; use them to pull yourself toward the foot end.
Call out. This is why you tell someone when you’re using it, and why the phone is in your pocket.
Two things reduce the odds of ever getting here: staying tethered at a shallow angle, and having a spotter for your first several sessions.
Teeter, for example, requires a spotter for new users and for anyone physically or mentally compromised.
Example Schedule – Your first Two Weeks
Days 1–3. Spotter present. Tether at 20 degrees. One to two minutes. The goal is the sequence, not the stretch.
Days 4–7. Same angle, up to three minutes. Practice the knee-bend recovery on purpose, while someone’s there, so it’s familiar rather than novel.
Week 2. If the return is effortless every time, go to 40 degrees. If it isn’t, adjust your height setting and stay at 20.
Beyond. 60 degrees is where the decompression benefit largely plateaus, and it’s a perfectly good permanent home. Full inversion is optional and always was.
Mistakes I See
Skipping the settings check because it worked last time. Households share tables. Somebody may have moved the pin.
Buying a table without checking the ankle lock reach. This is the number one thing people discover too late, and it’s model-dependent.
Treating soreness as progress. Ankle discomfort that doesn’t resolve with padding or a different cuff setting isn’t something to tough out.
Using it alone in an empty house early on. The equipment is fine. The isolation is the risk.
Going deeper because it isn’t “working.” If shallow inversion isn’t helping after a few weeks, more angle usually isn’t the missing ingredient. A conversation with a physical therapist probably is.
Final Thoughts
An inversion table isn’t hard to use – it’s hard to use casually, and that’s the distinction that matters after 70.
Set it up properly, learn the return maneuver before you need it, respect the dismount, and have someone around for the first week.
Do that and the equipment is genuinely manageable as long as your health allows you to use it.
Skip those things and the machine will find your weakest link on a day you weren’t expecting it to.
Frequently Asked Questions
Can you get stuck upside down on an inversion table? Being unable to return upright is almost always a balance-setting problem rather than a strength problem. The fix is to bend your knees and scoot toward the foot end of the bed, then lengthen the main shaft before your next session. Using the tether to limit your angle and having a spotter for your first sessions makes it very unlikely you’ll be in that position at all.
Why can’t I sit up to get out of an inversion table? Sitting up or lifting your head moves your weight toward the head end of the bed, which is the wrong direction. Teeter’s manuals specifically instruct against it. Bending your knees and sliding toward the foot end moves weight the correct way.
Do I need someone with me? For your first several sessions, yes. It’s smart to have a spotter for new users and for anyone physically or mentally compromised. After that it’s a judgment call, but if you live alone, keep a phone on you and tell someone when you’re using it.
How long should a session be? Start with one to two minutes and build gradually. Duration is not where the benefit lives, and long early sessions mostly produce sore ankles.
Can I use an inversion table by myself at 80? Age isn’t the variable. The variables are whether you can step over the shaft, reach the ankle lock, perform the knee-bend recovery, and stand up afterward without getting lightheaded. Test all four before you buy.
What shoes should I wear? Socks or thin, flat shoes. Nothing with a thick sole, and nothing that comes above the anklebone, because it prevents the ankle lock from securing properly.