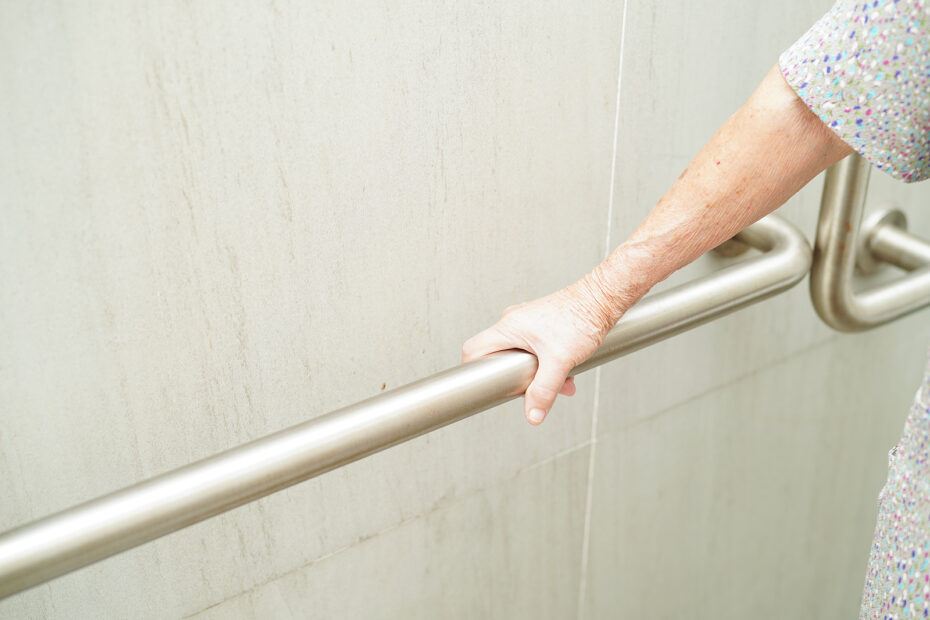
Grab bars are one of those small additions that can make a world of difference in the bathroom.
They can play a big role in preventing slips, trips, and falls, especially for the elderly and those with mobility issues.
And bathrooms tend to be one of the most accident-prone areas in a home (due to slippery floors and surfaces) – so anything we can do to reduce falls in here is worthwhile.
Before you decide to start drilling holes though, it’s a good idea to plan out where your grab bars will be going and that’s what we’re here to help with.
In this article, we’ll go over the most useful areas to place grab bars for optimal safety in the bathroom.
We”ll also provide a few additional tips to help you make the most out of your safety equipment.
After reading, you’ll be ready to get those bars up and start enjoying the benefits.
Ideal Locations for Installing Grab Bars
According to the Centers for Disease Control and Prevention (CDC), millions of older adults experience falls each year.
And according to some research, falls in the bathroom are more than 2x as likely to result in injuries.
But it’s not just about preventing falls – it’s also about providing a sense of security for seniors.
Anyway, when it comes to installing grab bars, placement is key. The areas you choose can make a huge difference in ensuring maximum safety and convenience:
Shower And Bathtub
Start with the shower and bathtub areas – these spots are where most slips happen due to wet surfaces.
Depending on the size of your shower/bathtub, you may want to install grab bars both vertically and horizontally.
- Vertical bars help when stepping in and out and should be placed at the entrance/exit of area
- Horizontal bars provide support when standing or moving around inside
- Bars can be mounted diagonally on walls as needed due to space restrictions
- Height placement for bars can vary a little, but most seniors will want bars placed around 36″ off the floor for easy grabbing
- If you’ll be using a shower seat, it’s a good idea to have a grab bar within easy reach of the seat for added security
Grab bars can be essential when it comes to seniors getting in/out of the bathtub, making the entire process much easier and safer.
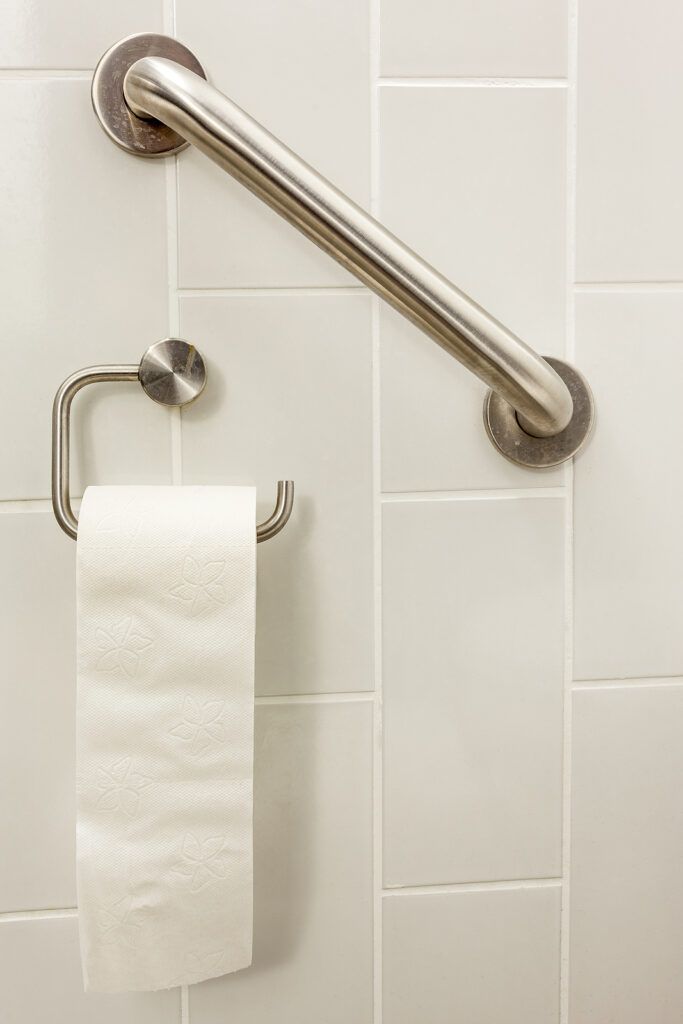
Toilet
Next up is the toilet.
Toilets, especially older ones, are notorious for being low and hard to get off of, so having a well-placed grab bar can make accessing the commode a lot easier.
Your options will obviously vary depending on your bathroom setup, but consider the following:
- Position a vertical grab bar on the wall beside the toilet, giving seniors something to hold on to when standing
- If you have a smaller bathroom, you be able to position a horizontal (or vertical) bar on the wall opposite the toilet
These bars can assist in lowering down and getting up, especially for those with limited mobility.
Adding a bar near the commode can be a game changer for improving senior independence.
Bathroom Entrance
Placing grab bars near the bathroom entrance can be another smart move, especially if you have a threshold to step over or don’t have enough space to fit a walker.
- A vertical bar near the entrance provides an extra handhold when entering or leaving and can help those who might need a little extra support.
- This is also a good idea if the floor outside the bathroom is different from the bathroom flooring.
Sinks and Towel Racks
You may also want to consider areas with high foot traffic or water spill risk.
For example, sinks and towel racks may benefit from a nearby grab bar too.
This placement can improve stability when reaching over to grab a towel or during activities like shaving or brushing teeth where water might splash around.
- Vertical or horizontal bars can be helpful for providing a safe place to hold on to while performing standing activities at the sink.

Types of Grab Bars
Choosing the right grab bar involves considering several factors – it’s not just about where they go, but also what type you use.
Different materials and finishes offer various levels of durability and aesthetic appeal:
- Stainless steel is a popular choice for its strength and rust-resistance
- Aluminum options are lighter and might suit different styles or budgets better
- Plastic bars are affordable and light-weight, but probably won’t last as long or provide as much support
Lengths and diameters vary, too.
Longer bars provide more area for gripping, which can be ideal for shower and bathtub areas, while shorter ones might be more convenient next to the toilet or sink.
The diameter usually ranges from 1.25 to 1.5 inches, which is generally comfortable for most hand sizes.

Texture is another consideration – textured grips offer better friction and can be safer, especially in wet conditions.
Smooth bars might blend in better with the decor, but they can be slippery when wet. Some bars come with ergonomic designs or added grip features to enhance safety as well.
You’ll also find options for temporary vs. permanent installations.
Permanent grab bars are bolted to the wall via studs and offer maximum support.
Temporary solutions like suction-cup grab bars may be tempting because they can provide flexibility and are great for renters or those who need a trial period before committing to a permanent fixture.
Just keep in mind that suction-cup models should not be relied on for full support because they can (and do) come loose.
Personally, I don’t recommend suction cup grab bars at all because I’ve worked with too many patients that’ve pulled them off the walls in a time of need.
So, I encourage you to opt for a bolt on option if possible.
Installation Tips and Best Practices
Installing grab bars correctly is paramount for their effectiveness – no matter if you’re a DIY enthusiast or planning to call in professional help, following best practices ensures safety.
If you or a family member is tackling the job yourself, make sure you gather all necessary tools and materials before beginnng.
Typically, you’ll need a drill, appropriate drill bits, a measuring tape, level, screwdriver, and hardware like wall anchors and screws.
- Start by marking the exact spots where the grab bars will go. Make sure to measure accurately to hit wall studs, which provide the most secure anchor points. If hitting a stud isn’t possible, use heavy-duty wall anchors designed for grab bars.
- Drilling pilot holes will make the final installation easier and more precise. This step also helps prevent tiles from cracking in tiled bathrooms.
- After setting the pilot holes, align the grab bar and use a level to ensure it’s perfectly horizontal or vertical, as needed.
- Fix the grab bar in place with screws, ensuring they are tightly secured. Give the bar a firm tug to test its stability. If there’s any wobble, double-check all your anchor points and screws, tightening them as necessary.
Common mistakes include misjudging the height or positioning, which can diminish the effectiveness of the grab bar.
Speaking of which, the standard height for grab bar placement (according to the ADA) is generally between 33 to 36 inches from the floor, but this might need to be adjusted based on the primary user’s height and needs.
It’s also easy to skip checking for wall studs or using inadequate anchors, so pay extra attention to these aspects.
DIY installation can save money, but if you’re unsure about any step, hiring a professional is a wise investment.
They bring expertise and tools, ensuring that every grab bar is installed correctly and securely – and the last thing you want is for a bar to come off the wall when getting in or out of the shower.
Finally, maintaining your grab bars is just as important as installing them.
It’s a good idea to check your bars regularly to make sure they’re not coming loose.
Final Thoughts
Ok, I think that about does it.
To summarize, the most common locations for bathroom grab bars are:
- a vertical bar at the entrance of the shower/tub
- a horizontal bar on the wall in the shower
- a vertical or horizontal bar near the toilet
But that doesn’t mean you can’t put grab bars in other locations in the bathroom too.
Keep in mind, it’s all about maximizing safety in your bathroom – so feel free to place grab bars anywhere else you may need them.
Also consider that installing grab bars doesn’t just benefit the elderly, but anyone else in need of extra support in the bathroom as well (people recovering from surgery or injury, those with balance issues, young children, etc).
And again, if you aren’t comfortable finding studs and installing a bar yourself, please hire a local handyman to ensure you get the job done correctly.
If you have any questions or comments, please leave ’em below and I’ll get back to you shortly.